In this tutorial, we’ll show you how to send out SMS Invoices with CloudContactAI
First, login to your CloudContactAI account.
Next, navigate to the Settings\Payment Collection tab. On the Payments Collection tab, select Authorize.net as your Payment Gateway. Enter your Authorize.net Login ID and Transaction Key. Specify your Default Currency and Default Message. For the Default Message, type “Hi ${firstName}, please pay your dues of ${amount}. To pay now, click ${paymentUrl} | To opt-out, reply stop”. The ${amount} value will be uploaded from your Campaign file. The ${paymentUrl} will be generated for your recipient by CloudContactAI and will point to Authorize.Net to capture the payment. Click on the Save button.
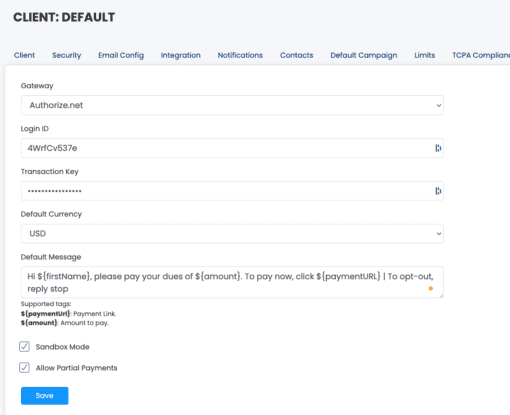
Next, you’ll want to prepare a Campaign file that contains the following fields: firstName, lastName, phone, amount, and dpd.
Navigate to the SMS Campaign menu item.

Click on the Create SMS Campaign button. In the Campaign Name text field, enter “First SMS Invoice Campaign”. On the Type of Campaign, pick Collection. Next, select that you’re going to Upload CSV to specify a file.
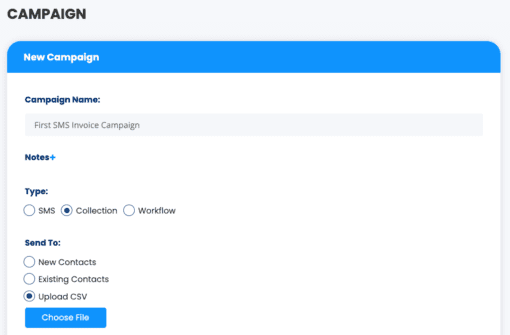
Specify your “campaign_sms_invoice.csv” file by clicking on the Choose File button.
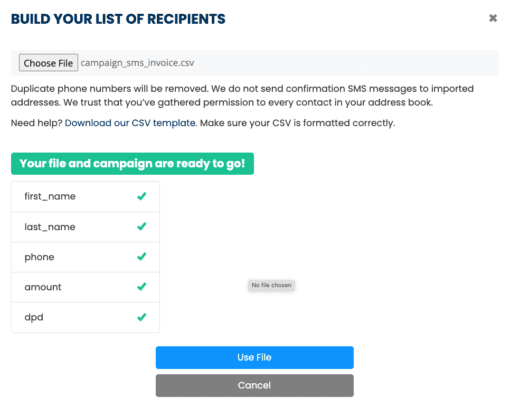
Click the “Use File” button.
Back in the Create SMS Campaign screen, enter your message into the Campaign Message from above, “Hi ${firstName}, please pay your dues of ${amount}. To pay now, click ${paymentUrl} | To opt-out, reply stop”

Click on the Send SMS Campaign button.
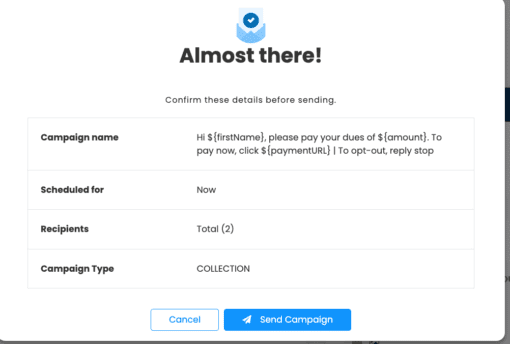
Your Campaign will be sent out.

Your recipient will receive the following SMS Message which contains the payment gateway URL that CloudContactAI has created for this contact to collect.

When you click on the link https://payments-cloudcontactai.allcode.com/payment?p=5nWdmw2R8a&i=fZLTdFqD2V. You’ll be taken to the Payment page.
The payment page will give the user the option to pay either full or partial amount
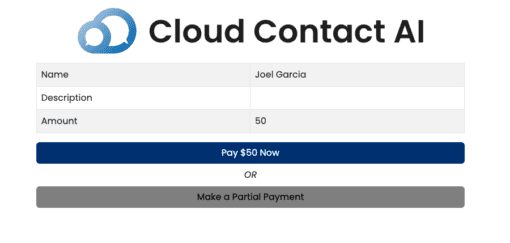
When you click “Pay $50 Now”, you’ll be given the opportunity to enter your credit card.
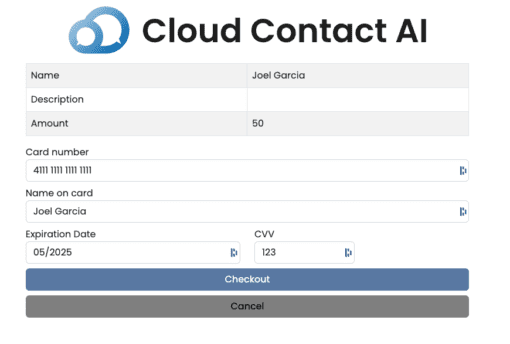
CloudContactAI will then process your payment.
